Printing plates are made from mining bauxite and then refining it to get aluminum rolls. The rolls are shipped to a printing plate manufacturer who uncoils, etches, cleans, and then dries them before sending it to a commercial printer.
Let's take a look at each of the steps. There are 3 stages to the manufacture of printing plates: Mining, production and prepress.
STAGE 1 - MINING
1. Bauxite - Making printing plates starts with bauxite. It exists around the belt of the equator and is mined and sent to refineries. Aluminum is in bauxite. It takes about two tons of bauxite to get one ton of aluminum and needs to be sent to a refinery to separate it.
2. Refining - In the refining process (illustrated below), the first step is called digestion where the bauxite is mixed with caustic soda and steam at high temperature. Then a clarification takes place where impurities like mud are allowed to settle in a tank. Two more purification process take place with precipitation and calcination whereby more impurities are removed.
3. Smelting - A large smelting refinery then prepares the aluminum for an electrolysis process. Because it is an electrical process, these smelting plants tend to be close to large power stations.

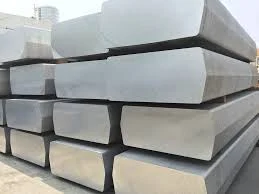
4. Casting slabs - The result when it is shipped from the refinery looks like this. To now process it into printing plates, it must be processed further.
 |
| Aluminum slabs |
5. Sawing and scalping - A saw will then cut the slabs into sheets that more closely resemble a printing plate. Here is a video that shows that process.
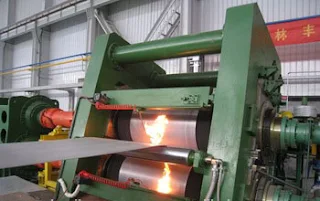
6. Pre-heating and hot rolling/cold rolling - The long thing sheets are then pressed and formed into a continuous rolls by means of a heating/cooling process.
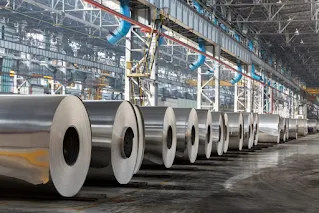
7. Shipping - The rolls are now prepared for various applications. This is the condition that printing plate suppliers receive to make printing plates.
At this stage, the aluminum rolls arrive at a printing plate supplier such as Agfa or TechNova in order to make the printing plates. They then proceed with several important steps to make the printing plates suitable for the printing press. Here are the steps of a typical inline system.
1. Uncoiler - The aluminum roll is mounted on the plate making machine to process the printing plates.2. Etching - Aluminum will oxidize when it comes in contact with the air and this layer of oxide must be removed. Etching removes it.3. Cleaning - The surface now undergoes a cleaning to prepare for graining.4. Graining - This is an electronic process whereby the surface of the aluminum is "roughened" to increase it's surface area. This allows the plate to be more hydrophyllic, or water loving.5. Drying - Following the graining, the wet surface must be dried in order to be anodized.6. Anodizing - The aluminum sheet is now extremely sensitive to oxidation and breakdown. Too sensitive to go on a printing press. Anodization will now improve the durability of the plate, making it more resistant to corrosion and wear on press.7. Coating and drying - Once again, another process seeks make the plate sealed even further, and provide the base for a coating to be etched onto the plate when it receives and image for the printing press. This process shown in the diagram below continues inline with the one above. This will protect the hydrophilic properties of the plate and close the pores in the aluminum oxide.
8. Buffering and surface inspection - The printing plate material will be continuously measured and monitored at this point. (see diagram above)9. Customizing size for the printer - The process continues as shown in the diagram below to cut the aluminum according to size ordered by printers. The edge trimming and crosscutting can be made custom according to the printing press cylinder circumference. Packing and stacking of the printing plates takes place here.
10. Delivery of the printing plates to the press room.
STAGE 3 - PREPRESS
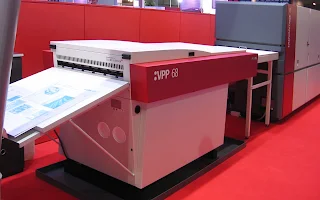
1. Burning - After arriving at the printing company, the plates are already cut to the size that will fit on the printing press. Now the printed image must be burned on the plate. This requires a machine called an image setter. With a laser it burns an image onto the plate.
2. Developing - After the image is etched by the laser onto the printing plate, now must be developed. This will remove any hydrophobic coatings that were not etched onto the plate.
3. Mounting - And lastly the plate usually goes through a bender or a punch to allow mounting to the printing press. The pressman then mounts it and the fun begins!
Why aluminum is the best material to make printing plates.
This is mainly because aluminum has several properties that give it the advantage over other materials. Here are the advantages:
1. Dimensional stability. On a running printing press, printing plates that will not stretch, crease or bend are critical. It would be nearly impossible if plates were made with softer metals that could stretch under under strain. For example, maintaining register would be impossible.
2. Aluminum is light. The advantages are from the shipping to mounting. Lightweight materials are easier to work with.
3. Aluminum has hydrophilic properties. It is water loving. The surface area is even increased to magnify the process by means of an electrical process mentioned earlier.
4. It recycles. In fact a very high rate of return for the metal recycled.
5. It is durable. The plates can last into the millions of impressions.
That's it! From the raw bauxite, right to the printing press, that's how printing plates are made.


Comments
Post a Comment